We have a winner!
I finally decided I could no longer avoid removing the PSU from the case to check the capacitors, rectifiers and transformer.
Now if you recall I had a problem with the scan of the service manual in that the colours of the wires were not clear. I asked on the facebook group and David Cilia kindly took a photo of the area I was interested in and it’s so nice to see the colours.
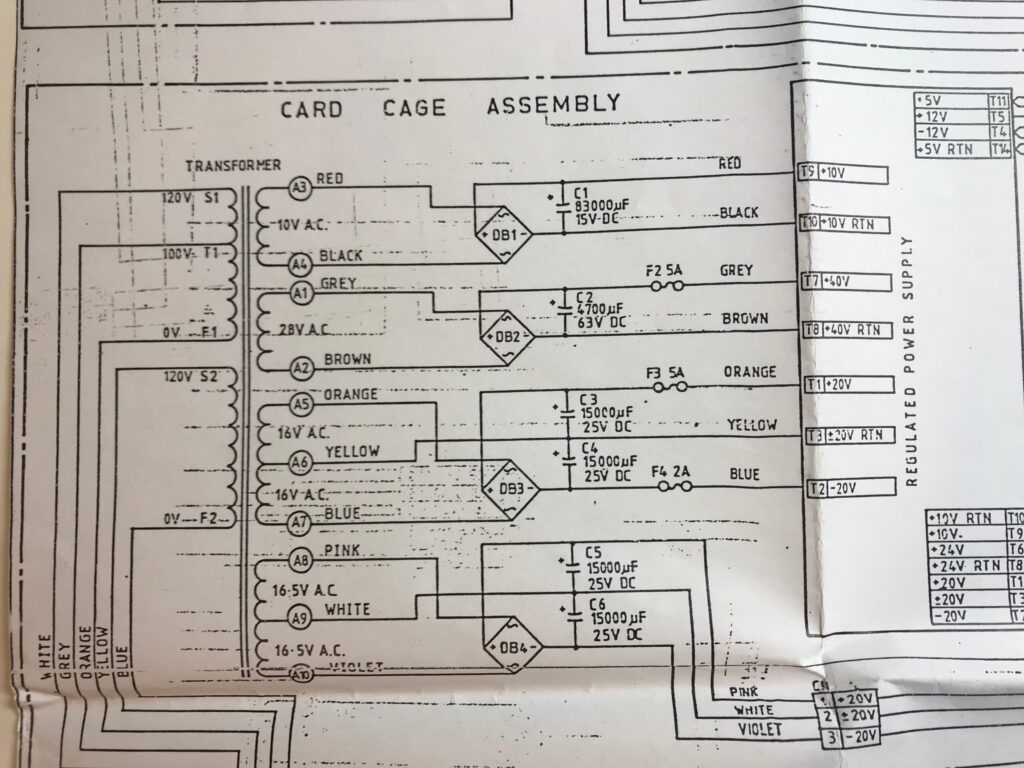
David also sent me pictures of the full page (left hand side and right hand side), Peter Welik also sent me another picture of the page I needed, wonderful!
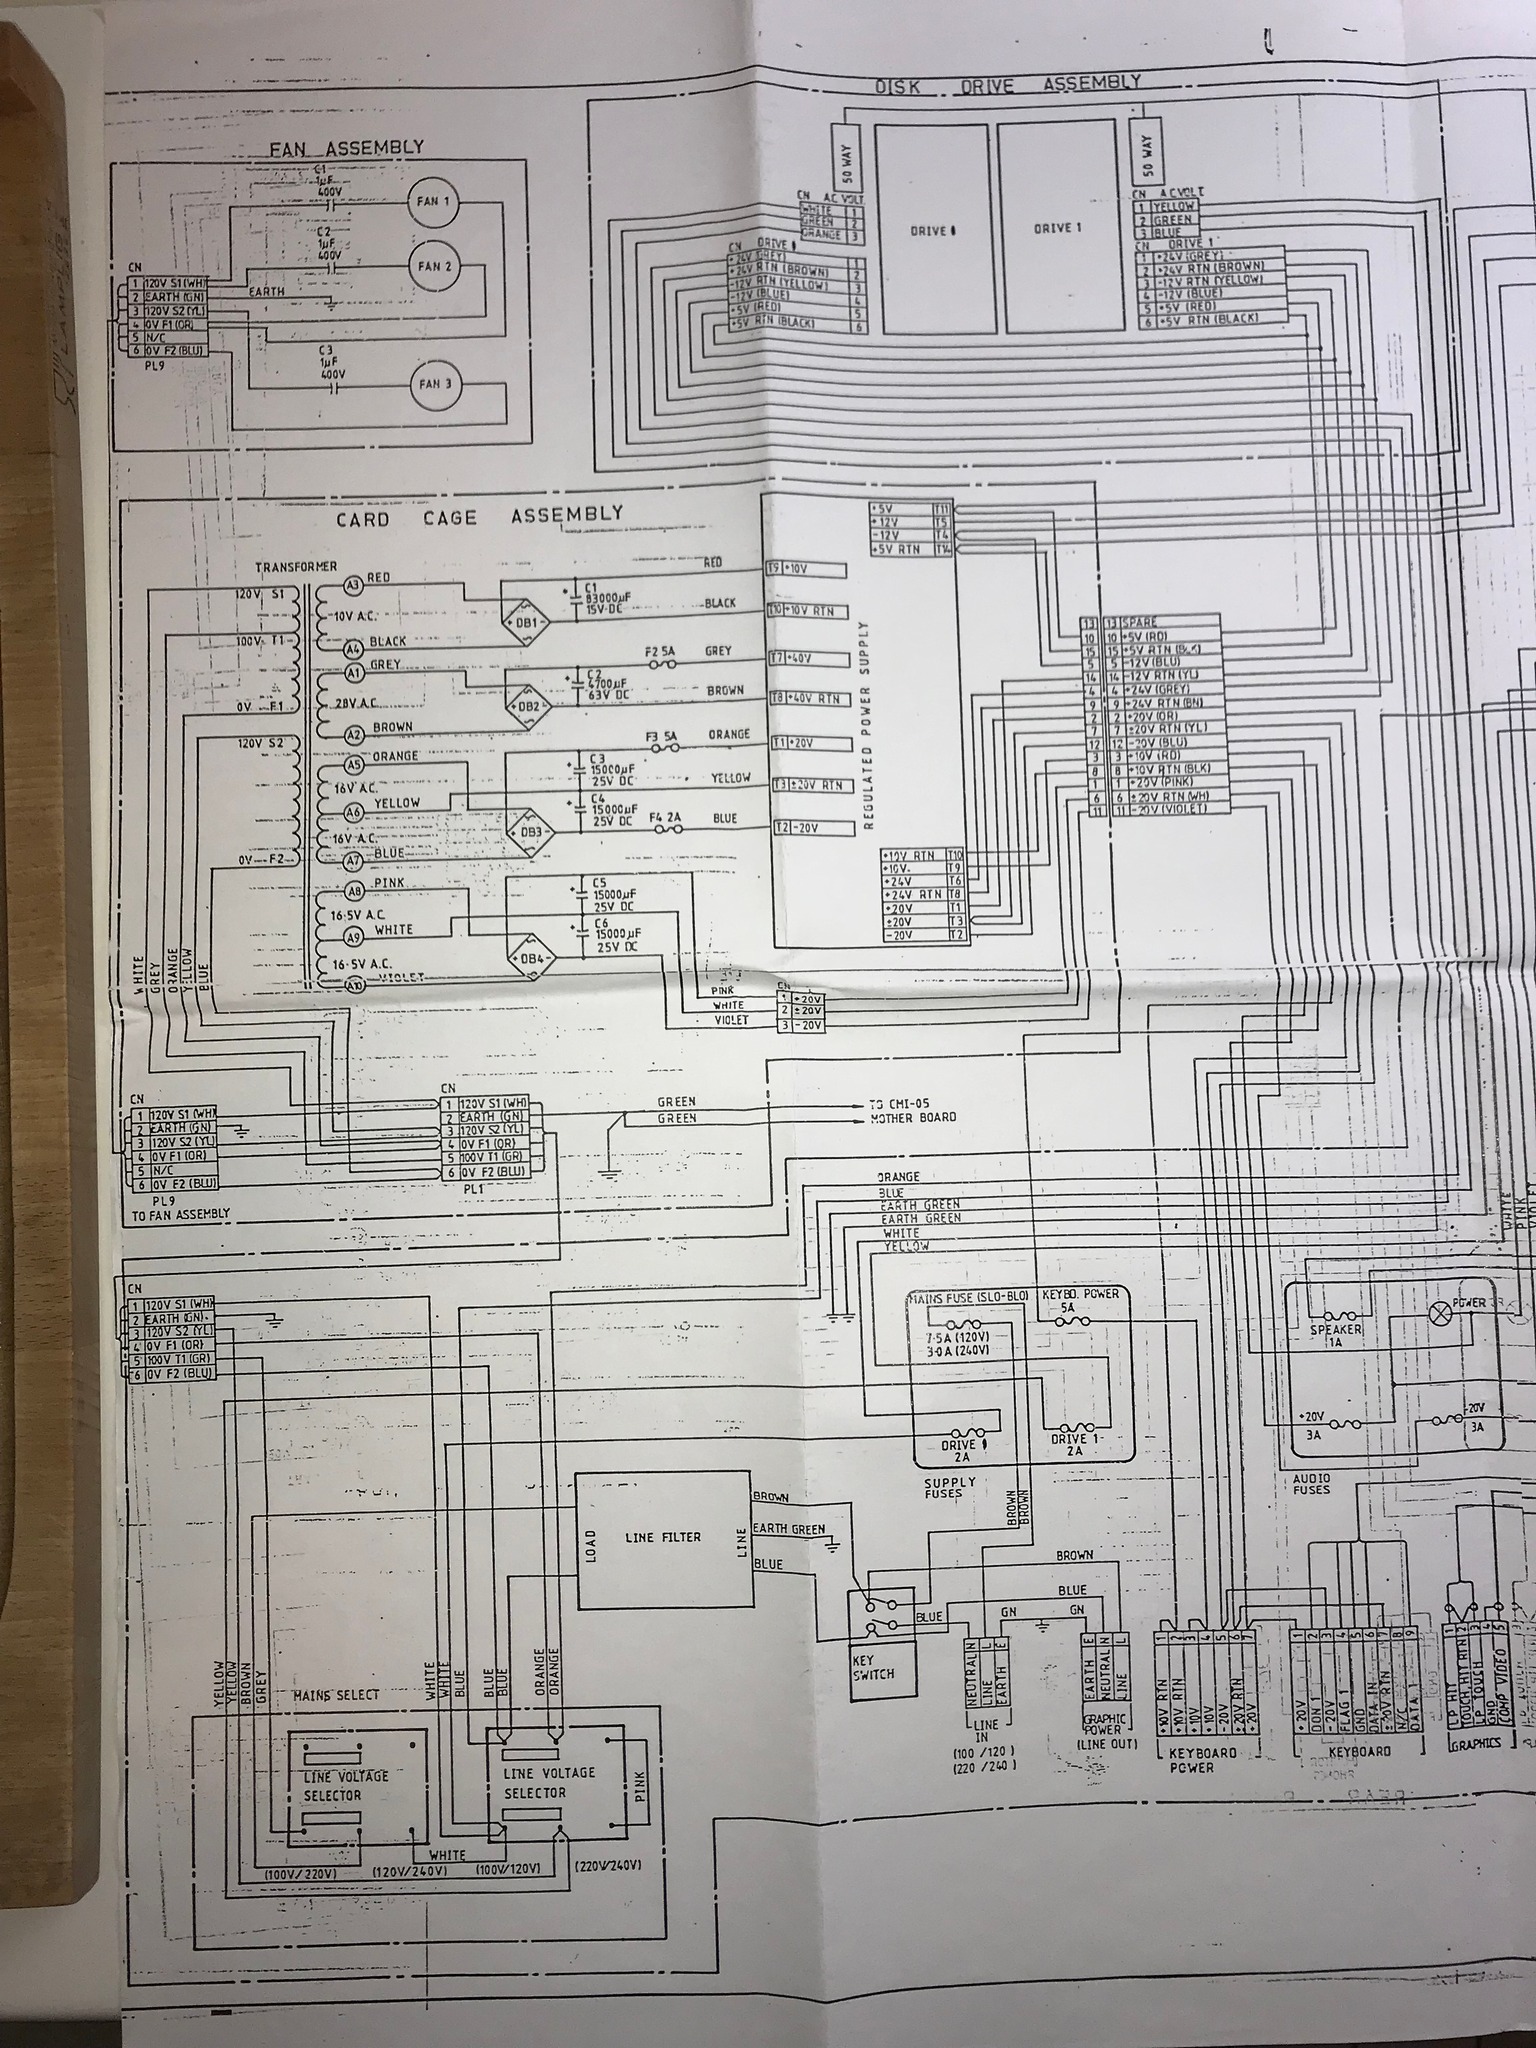

So please give his web site some love, he has a bunch of other useful links and manuals there too! https://www.outofphase.fr/en/links-fairlight/
Armed with this knowledge I was able to begin removing the PSU.
I have to say, I’m really disappointed that Fairlight chose to rivet the PSU in place, yes rivet, the transformer and metal work holding the caps is riveted. Please, don’t do this, it makes servicing and repairs a total nightmare.
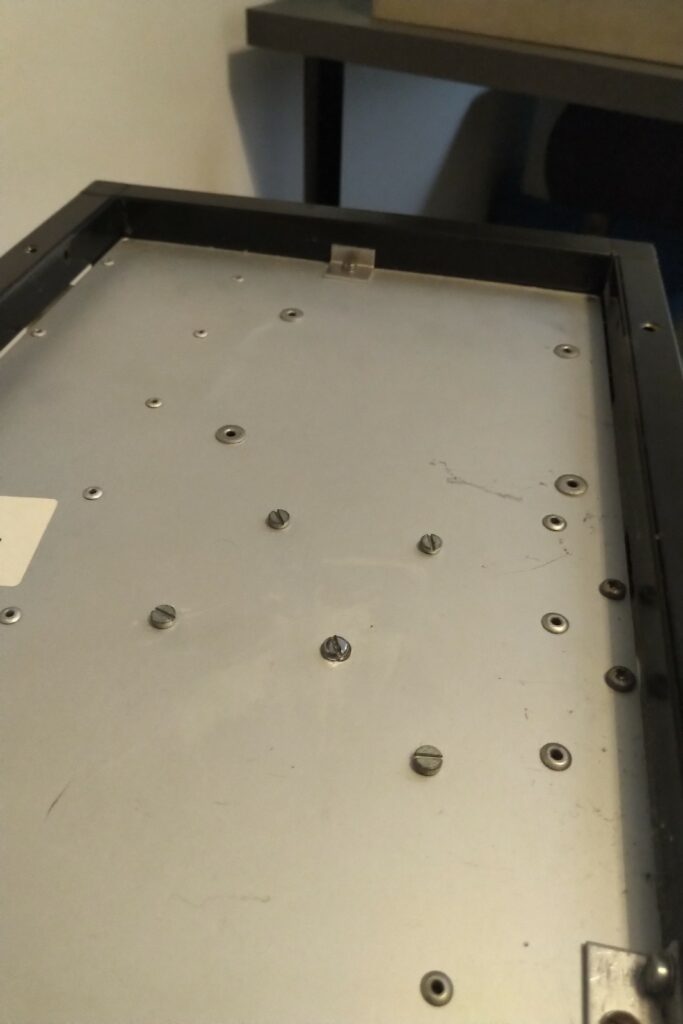
So having removed the top and bottom panels previously I removed the side panel and the rear panel. Then I removed the fan tray. And after undoing what felt like a million nuts, bolts and screws I was then able to wiggle out the frame, it was NOT easy.

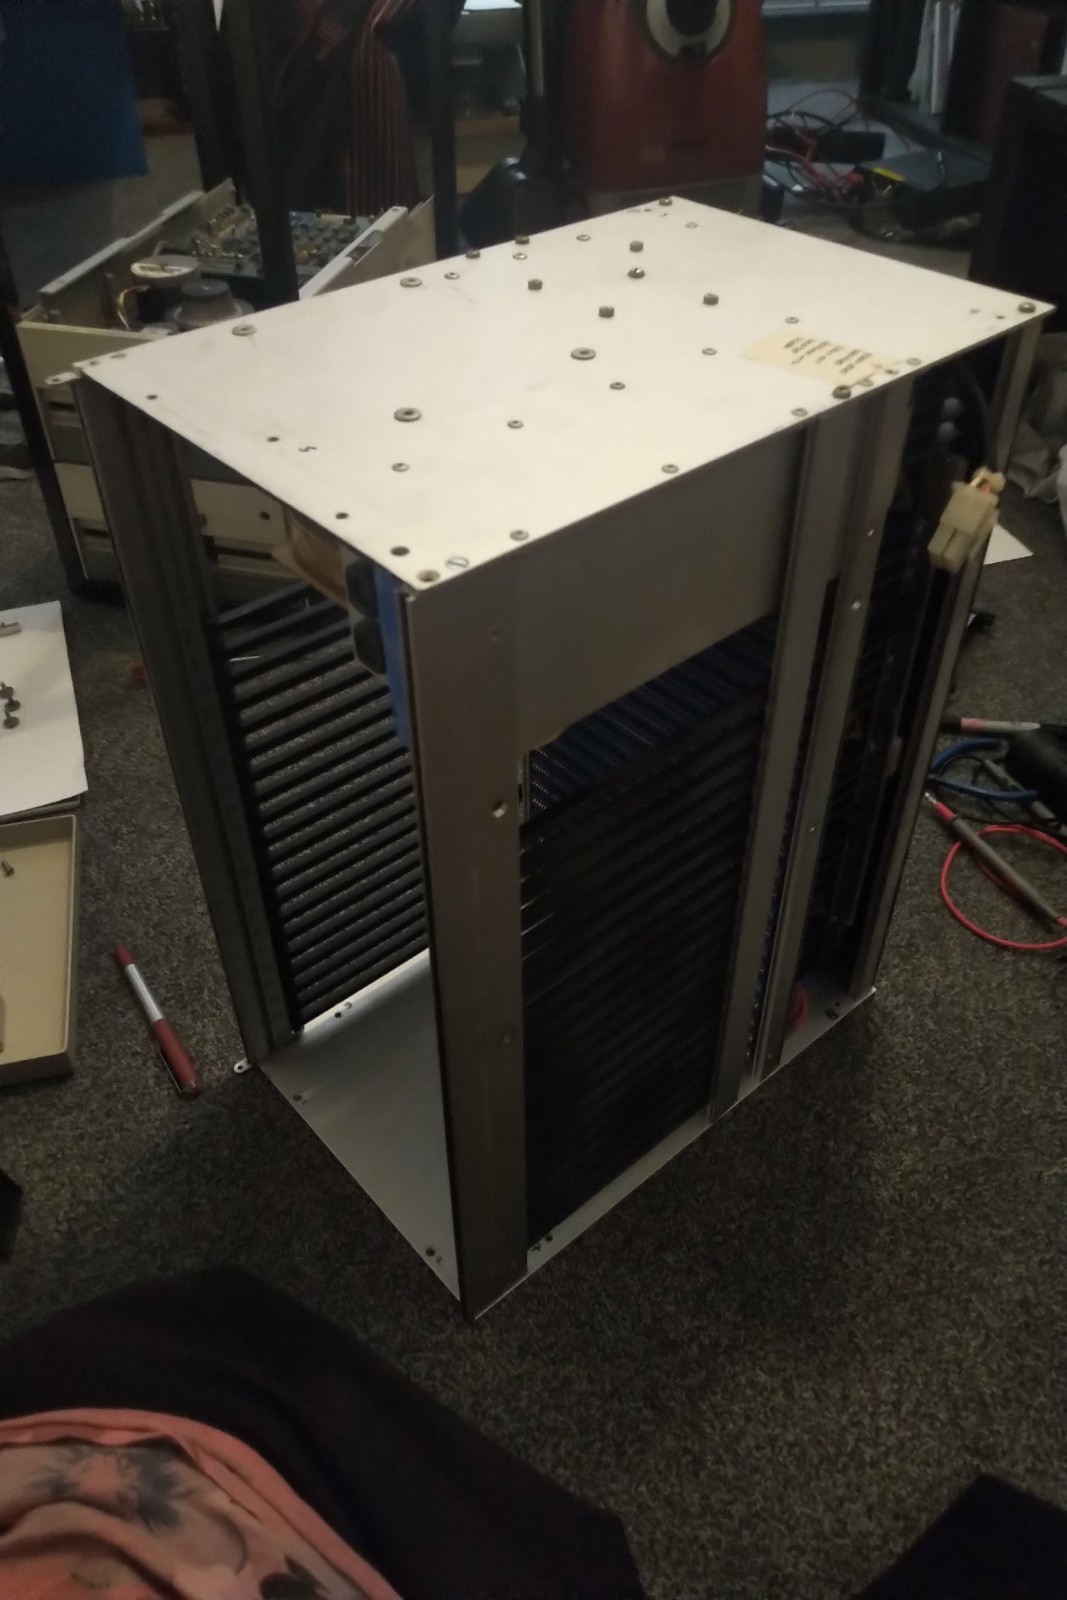
Next I had to separate the PSU (which is riveted to one side of the card frame). This involved some more screws (yay!) and also removing the rear regulators.
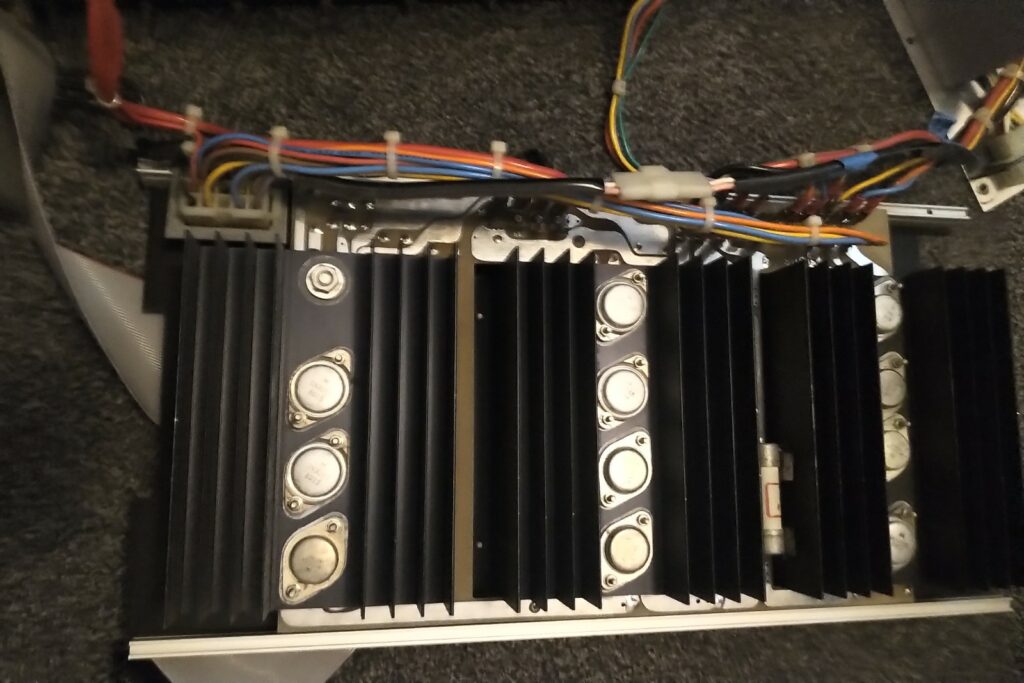
Then I had to remove the spade connectors from the regulators and then finally I had the PSU on my bench!
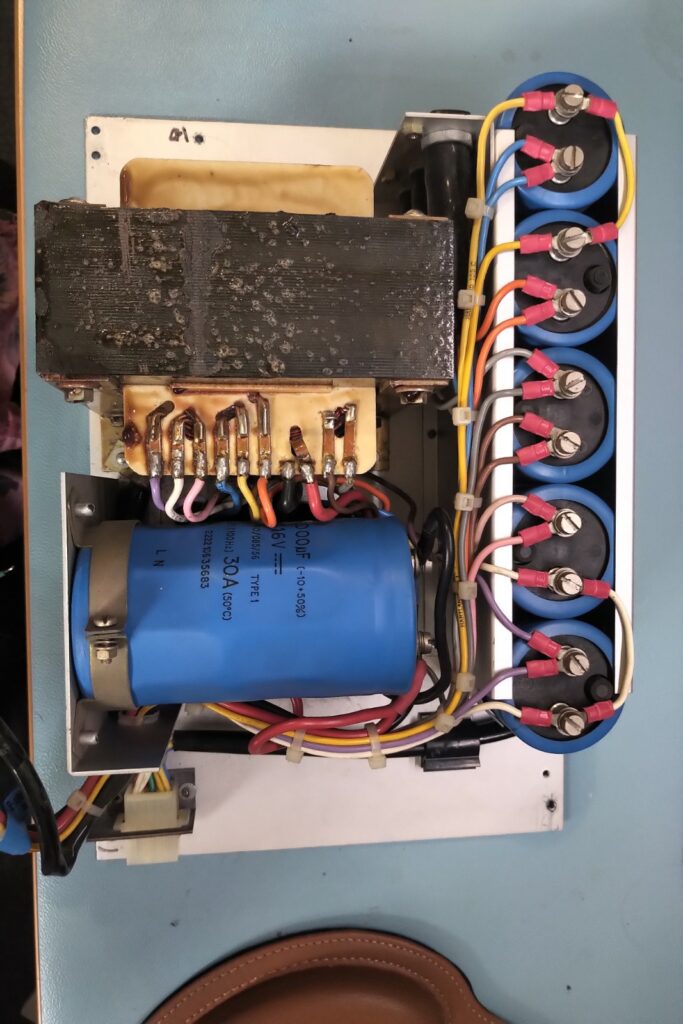
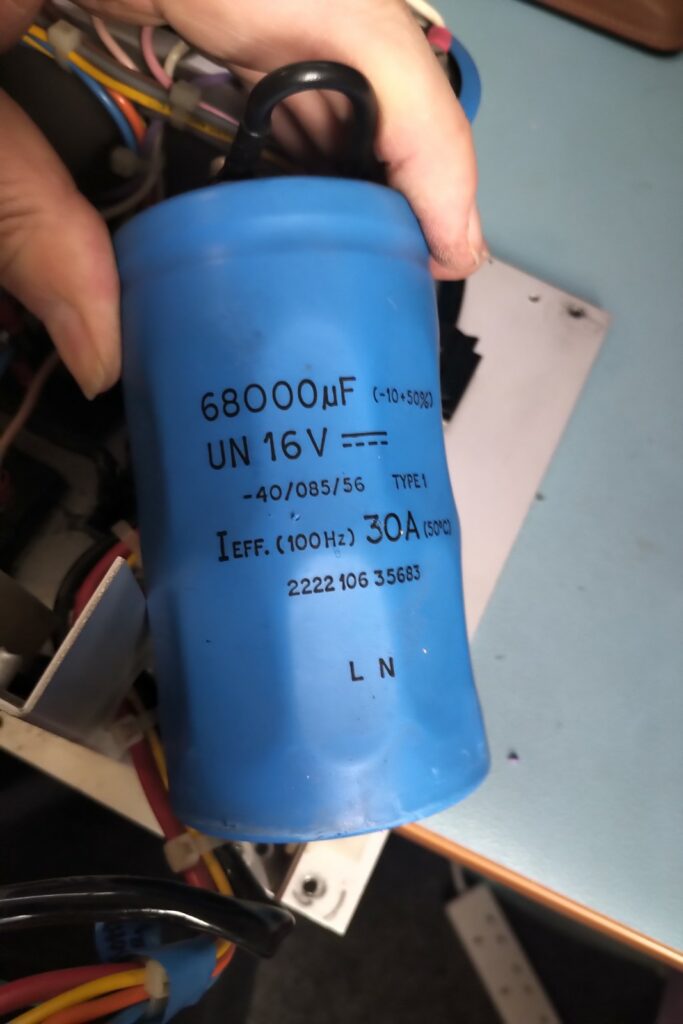
And she is a big power supply, weighing in at just over 9Kg! The capacitor you see there is literally the size of a can of coke.
So, I set about discharging the capictors, and testing them. The capacitors were all within tolerance and no dead shorts.
Next checking the bridge rectifiers, now I was praying it was one or more of these, if not it would be the transformer and that would cost a chunk of money as it would have to be a custom rewind.
Finally one of the rectifiers, the one for the 5V 15A supply, had a problem, two of the diodes on the bridge were dead short, WE FOUND THE CLUPRIT! The other 3 rectifiers were ok.
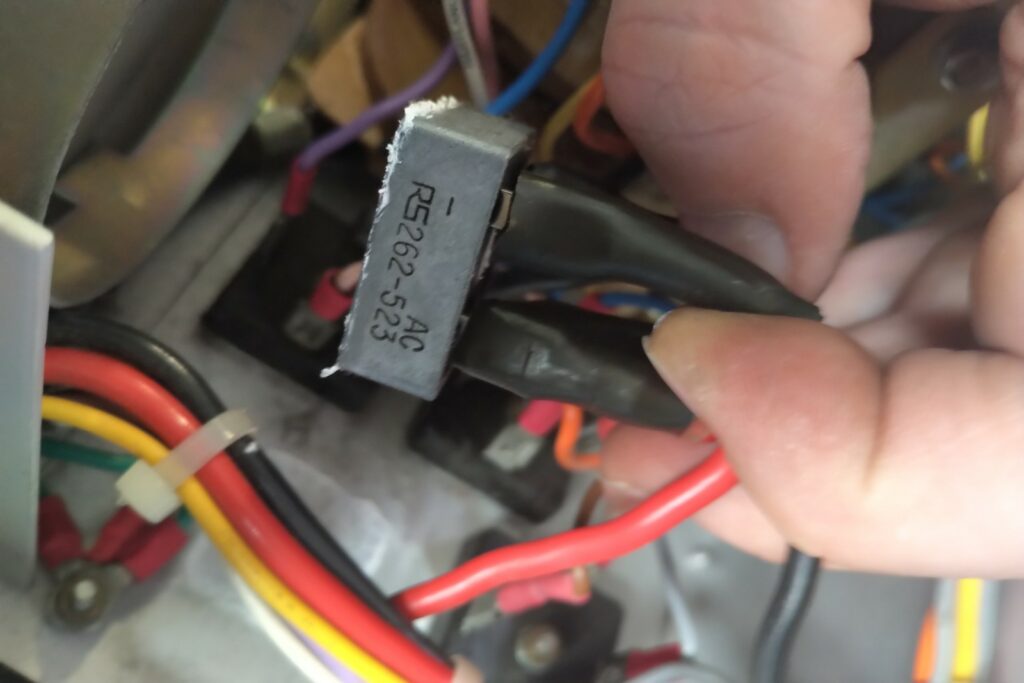
Now this has an RS part number on, sadly the part number is no longer valid so I cannot check the specs, but this does make me think that this has been replaced before.
So I’ve found a couple of possible replacements from RS and ordered them, they should be with me in the next few days.
The plan then is the following;
- Replace the rectifier and test the bare PSU (transformer, rectifier and caps) with mains, to see if the fuse remains intact.
- Put the PSU back onto the card frame and reattach the regulators, then apply mains and check the fuse again.
- Then fit the card frame into the chassis, reattach the other bits (back panel, drives, etc) and check again.
I’m hoping that this is the only fault. But I am worried about the drives as they’ve been closed without a disk in and moved around a number of times over the last 20+ years. so I am concerned about head damage. But first things first does it power up and stay up!
More in a week or so…..